Space Abend

Space ABEND generally occurs when your system encounters the end of volume condition occurs. There are three types of Space ABEND as mentioned below.

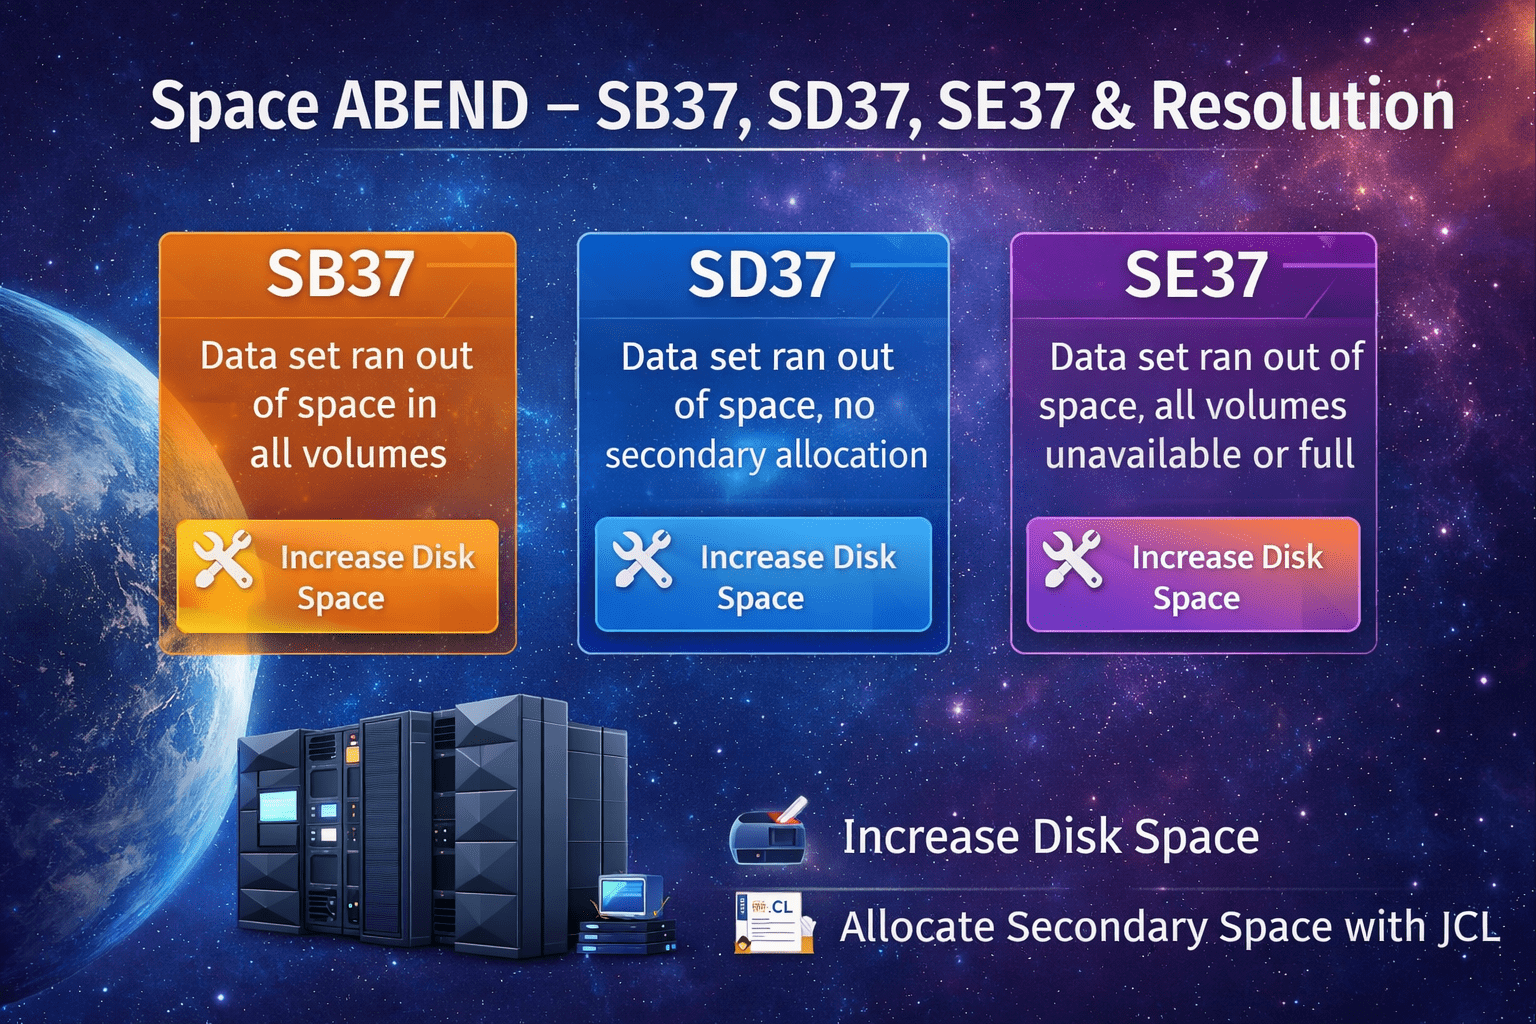
  • SB37: There are not enough space or no more extents available on the current volume. The system gave all the primary space and as much secondary space as it could. Disk volume out of space, cannot write output.
  • SD37: Primary disk space was exceeded and either no secondary space allocation was specified, or it was insufficient.
  • SE37: When there are no more volumes available. 

The SPACE parameter specifies the primary and secondary allocation. A space request like (CYL,(100,100)) means the system would try to allocate 100 cylinders of primary space. The secondary space is the overflow size. That is if the dataset becomes full, system routines extend the dataset by another 100 cylinders of secondary space. For the non-VSAM dataset, the system allows up to 16 extents of a file per disk volume. Theoretically, you can therefore have a file size of 1 primary extent and up to 15 secondary extents. For a space request like (CYL,(100,100)), this translates to a maximum size of 100 cylinders + 15 x 100 cylinders = 1600 cylinders of space.

Steps to Fix Space Abend:

Give primary and secondary allocations: While allocating your dataset give primary and secondary allocations in space specification provided that there are enough DASD units for secondary space allocation, it is important also to maintain some sort of a reasonable balance between primary and secondary space requests.  While there are no universal rules for determining what balance is “right”, there is a “rule of a thumb” that works reasonably well in most cases.

  • Evaluate the “peak” volume of the output data set (CYLs or TRKs).  One good way is to look at input file processing of which caused B37 abend and make approximate adjustments based on the ratio of output/input record lengths.  Let it be 100 CYLs, for example.
  • Use 50% of the “peak” volume as primary space and 10% of the peak volume as secondary space.  This will give the following space allocation for  100 CYL “peak” volume example:  SPACE=(CYL,(50,10),RLSE). Release unused space when the output data set gets closed is a good practice improving the overall performance.
  • As can be easily seen, this allocation balance, while requesting only 50% of “peak” volume upfront in primary space request, permits to increase data set  size up to 200% of the “peak” volume (50%+15*10%=50%+150%=200%).  Provided, of course, that the sufficient number of DASD units was defined.  For most practical situations (a typical one is space request for sort work files) this will be a reasonable balance between primary and secondary space.

Allocate the same dataset with a different name: It is always nice to create another dataset with the same DCB parameters. Give space parameters so that you can your dataset can fit in. You can just go to your JCL and change DD name to a new one. If you want to allocate with the same name then delete the existing one and reallocate.

Use data class Compress: You can prevent the dataset to exceed space by using the data class COMPRESS. This data class can be used for only DASD files, It won’t work with the TAPE files in the systems. It is very simple to use just add the statement DATACLAS=COMPRESS in your dataset parameter list separately.

Use Dataset name type Large: In order to accommodate huge volume datasets in Large format, PS files were introduced in z/OS 1.7 . They can allocate space beyond 65535 tracks per volume. A large dataset type is available for PS datasets. Generally, they are used for storing large format datasets.

Command to compress the PDS: In case if you are editing a member is PDS and you are not able to save it due to space issues then you can just open a new ISPF window. Go to option 3.4 browse. Put the PDS name and hit enter. Once the PDS name gets listed then put a command ‘Z’ against it. The dataset will be compressed.

TMSFORMT Expand utility: This utility can be used in order to move the dataset to a new volume and allocate new space parameters for the same.

TAPE datasets instead of DASD: This is one of the preventive techniques you can use for allocating the large dataset. You can use the TAPEs for storing the datasets instead of DASD. If you don’t need tape then use GDGs for storing large datasets.

Steps to Fix Space Abend in PDS:

If you are in an edit session, you are not able to leave the session until you deal with the problem. Some of the things you can do are:

  • Compress the data set, if it is a PDS, by doing the following:
    • Split (PF 2) the screen and select the UTILITIES option (option 3).
    • Select the LIBRARIES option (option 1) on the Utility Selection Menu.
    • Specify the name of the data set and enter C on the OPTION line.
    • When the data set is compressed, you see the message: COMPRESS SUCCESSFUL
    • You should then be able to swap (PF 9) to the edit session and save the new material.
  • Allocate a larger data set and copy into it by doing the following:
    • Split (PF 2) the screen and select UTILITIES (option 3), then DATASET (option 2) from the other side of the split.
    • Specify the name of the data set that received the abend to display its characteristics.
    • Allocate another data set with more space.
    • Select the MOVE/COPY (option 3) on the Utility Menu to copy members from old to new larger data set.
    • Browse (option 1) new data set to make sure everything was copied correctly.
    • Swap (PF 9) back to the abending edit session, type cc on the top line of input, cc on the bottom line of input, create on the COMMAND line, and press the Enter key.
    • Enter the new, larger data set name and a member name to receive the copied information.
    • You again see the abending edit session. Enter cancel on the COMMAND line. Press the RETURN PF key (PF 4) key to exit the edit session.
    • Select the DATASET option (option 2) from the Utility Selection Menu to delete the old data set.
    • Rename the new data set to the old name.
  • Cancel the new material entered in the edit session by entering cancel on the COMMAND line. You should then be able to exit without abending, however, all information that was not previously saved is lost.

Note: Some installations use Space Manager to increase space for a data set. By issuing a command, they can automatically increase the data set’s space & avoid Space Abend.

Read JCL blogs : Click Here SYNCSORT Manual : Click Here

Scroll to Top