Outlook Rules evaluate your incoming or outgoing email messages and take various actions with them based on sets of instructions you set up, called . You can create outlook rules based on different message criteria, such as the message sender, message recipients, message content, attachments, and importance.
Server-based outlook rules vs client-only outlook rules
There are two types of rules in Outlook — server-based and client-only.
- Server-based rules: When you are using a Microsoft Exchange Server account, some rules are server-based rules. These rules run on your mailbox on the Exchange mail server, even when Outlook isn’t running. Server-based rules must apply to messages when they are first delivered to your Inbox, and the rules must be able to run until they are completed on the server. For example, a rule that specifies that a message be printed can’t run until it is completed on the server. If a rule can’t be applied on the server, it is applied when you start Outlook and then becomes a client-only rule.
- Client-only rules: Client-only rules are rules that run only on your computer. These are rules that run in Outlook instead of on the Exchange server. Client-only rules can only run when Outlook is running.
If your list of rules contains both kinds of rules, the server-based rules are applied first, followed by the client-only rules.
Creating a Outlook Rule from an Email Message
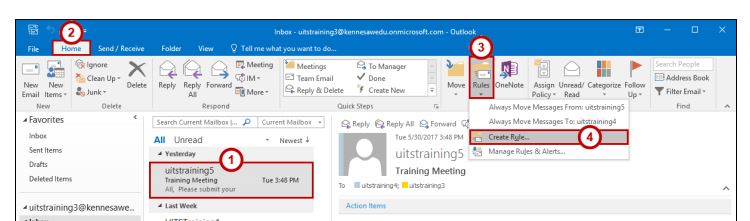
- 1. In the message list pane, click the mail message you want a rule for (See Figure 1).
- 2. Click the Home tab from the ribbon (See Figure 1).
- 3. Click Rules (See Figure 1).
- 4. From the Rules drop-down, click Create Rule (See Figure 1).
OR
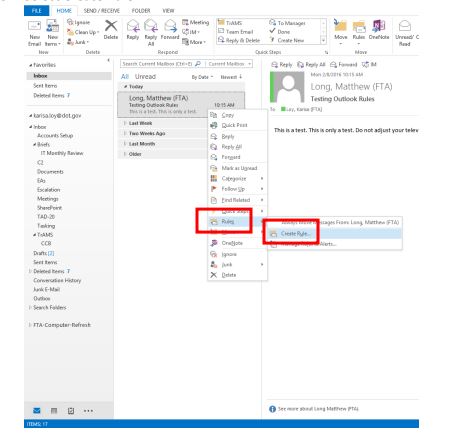
- Right-click the message you would like to base the rule off of (See Figure 1A).
- Hover over Rules (See Figure 1A).
- Select Create Rule (See Figure 1A).
5. In the Create Rule window, the rule will automatically be filled with information from the email message. The following explains what you can add, edit, or delete for a rule:
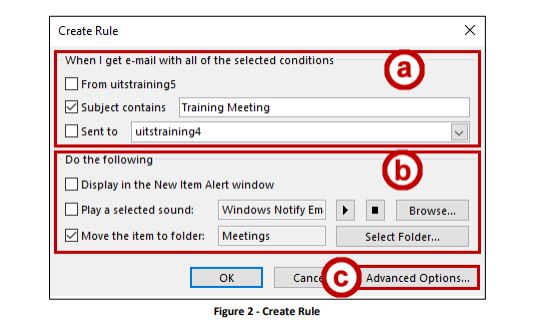
- Condition – When the message arrives, and it matches all of these conditions (See Figure 2).
- Action – Does the following actions if all of the conditions match (See Figure 2).
- Advanced Options – Add more conditions, actions, or exceptions to the rule (See Figure 2).
6. Select any of the conditions and change any of the criteria for the condition.
7. Select any of the actions and change any of the criteria for the action.
8. Click Advanced Options to add or remove more conditions, actions, or exceptions.
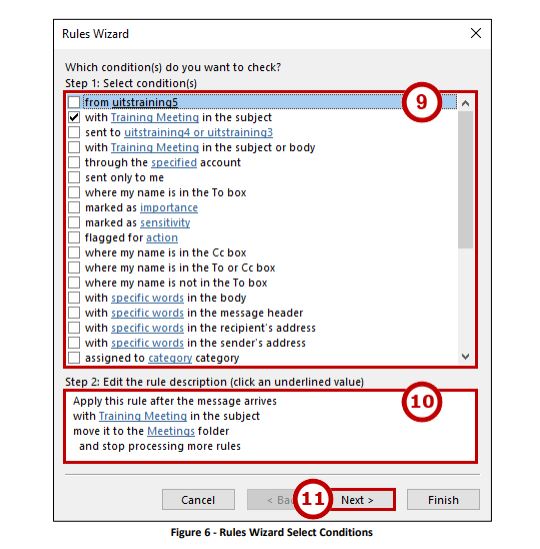
9. In the Rules Wizard window, select more conditions if needed.
10. Change the criteria for the conditions, actions, or exceptions.
11. Click Next.
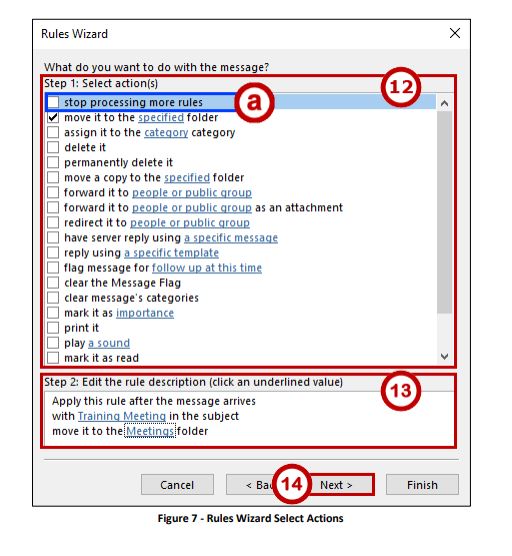
12. In the Rules Wizard window, select more actions if needed (See Figure 7).
- Click to un-select the checkbox next to stop processing more rules (See Figure 7).
Note: If you want the rules to stop processing after it meets the criteria of this rule, leave this box checked.
13. Change the criteria for the conditions, actions, or exceptions (See Figure 7).
14. Click Next (See Figure 7).

15. In the Rules Wizard window, select more exceptions if needed (See Figure 8).
16. Change the criteria for the conditions, actions, or exceptions (See Figure 8).
17. Click Next (See Figure 8).
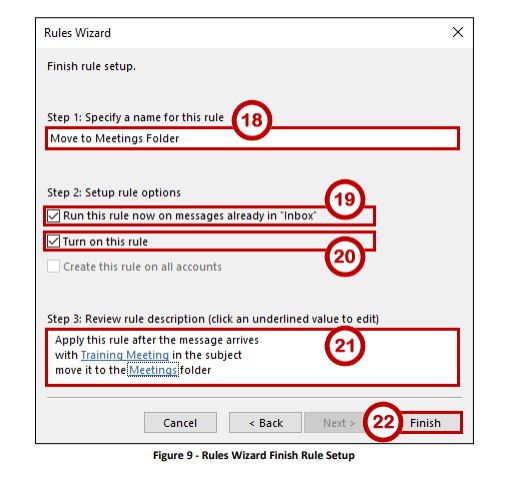
18. Type a short descriptive name to describe the rule (See Figure 9).
19. Click to select the checkbox next to Run this rule now on messages already in “Inbox” (See Figure 9).
Note: If you don’t want this rule to run on messages already in the inbox, leave this box un-checked.
20. Click to select the checkbox next to Turn on this rule (See Figure 9).
21. Review the rule (See Figure 9).
22. Click Finish (See Figure 9).
Create a New Outlook Rule
1. On the Info page of the backstage view, click the Manage Rules & Alerts button to display the Email Rules page of the Rules and Alerts dialog box.

2. On the E-mail Rules page, click New Rule to start the Rules wizard. You can base a rule on one of the nine rule templates provided by Outlook, or you can start from a blank rule for incoming or outgoing messages.
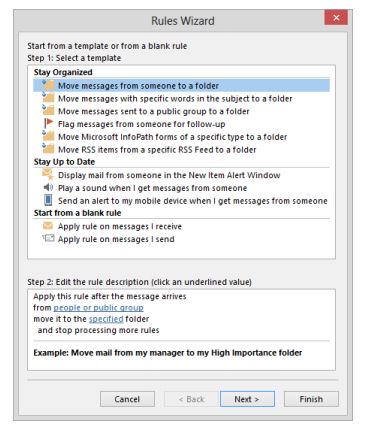
3. In the Select a template box, click each of the rule templates in the Stay Organized and Stay Up to Date lists. Notice that the criteria and actions associated with the selected rule appear in the Edit the rule description box.
4. In the Start from a blank rule list, click Apply rule on messages I receive to display the first criterion of the new rule in the Edit the rule description box.
5. In the Rules wizard, click Next to display a list of conditions that you can apply to incoming messages
6. In the Select condition(s) box, scroll through the list to view the conditions you can apply. Then select with specific word(s) in the subject check box to add the selected condition to the Edit the rule description box. You can specify as many conditions as you want.
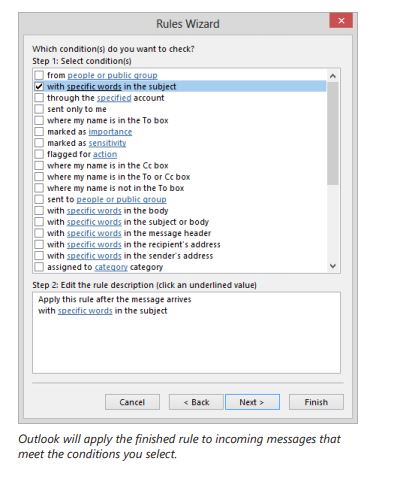
7. In the Edit the rule description box, click the underlined term specific words to open the Search Text dialog box.
8. In the Specify words or phrases to search for in the subject box, enter SBS. Then click Add to move the specified term to the Search list box. Notice that the wizard encloses the term in quotation marks.
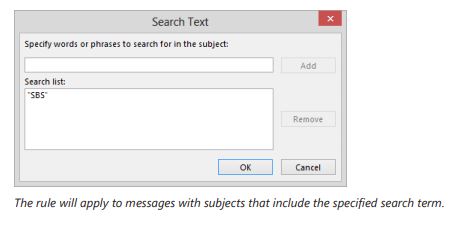
9. In the Search Text dialog box, click OK. Then in the Rules wizard, click Next.
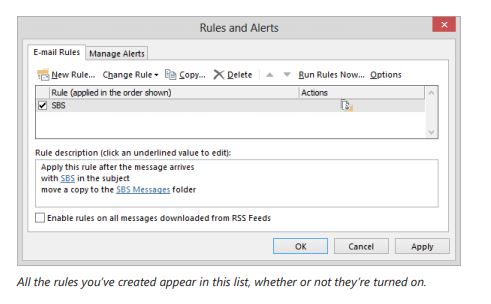
10. Scroll through the Select action(s) list to review the actions Outlook can perform on incoming items that meet the criteria you specify. Then select the move a copy to the specified folder check box (not the Move It To Specified Folder check box).
11. In the Edit the rule description box, click the underlined word specified to open the Rules and Alerts dialog box, which displays the folders in your mailbox.
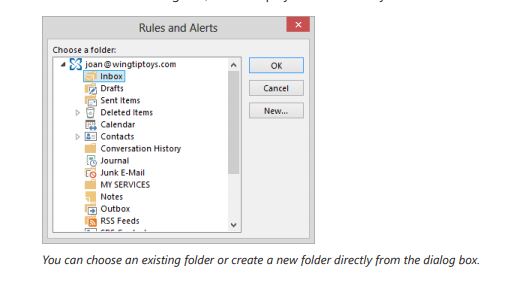
12. In the Rules and Alerts dialog box, scroll through the list of folders if necessary, click the SBS Messages folder, and then click OK.
TROUBLESHOOTING If you didn’t create the SBS Messages folder in an earlier exercise, click your mailbox at the top of the Choose A Folder list, click New, enter SBS Messages as the folder name in the Create New Folder dialog box, and then click OK.
13. In the Rules wizard, click Next to display a list of conditions under which Outlook will not apply the rule to messages that meet the previously selected condition.
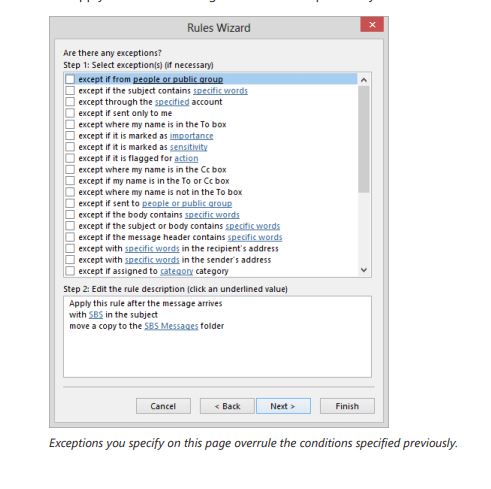
14. In the Rules wizard, without selecting an exception, click Next to summarize on the final page of the wizard the parameters of the SBS rule.
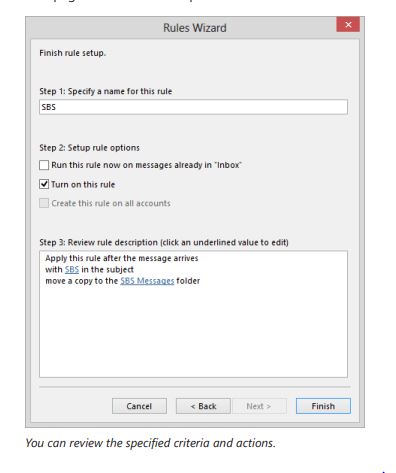
15. Select the Run this rule now on messages already in Inbox check box, and then click Finish to save the rule and run it on the contents of your Inbox. In the Rules and Alerts dialog box, the selected check box to the left of the rule name indicates that this rule is active and that Outlook will apply it to all incoming messages
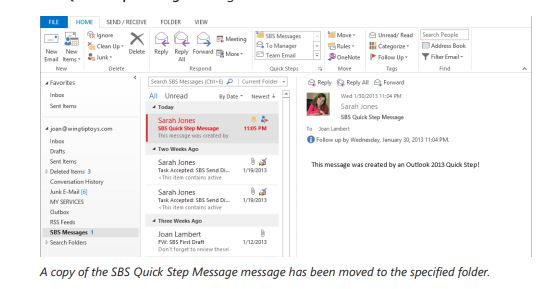
16. In the Rules and Alerts dialog box, click OK. Then return to the Inbox and locate the SBS Quick Step Message message you sent to yourself in the preceding exercise.
17. In the Folder Pane, click the SBS Messages folder. The folder contains practice messages you created in earlier chapters of this book, in addition to a copy of the SBS Quick Step Message.
Managing Outlook Rules
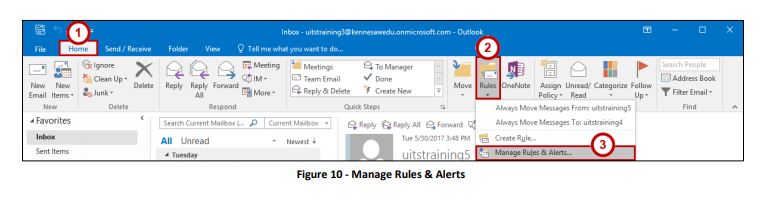
1. Click the Home tab from the ribbon (See Figure 10).
2. Click Rules (See Figure 10).
3. From the Rules drop-down, click Manage Rules & Alerts (See Figure 10).
4. You can do the following to manage the Rules and Alerts:
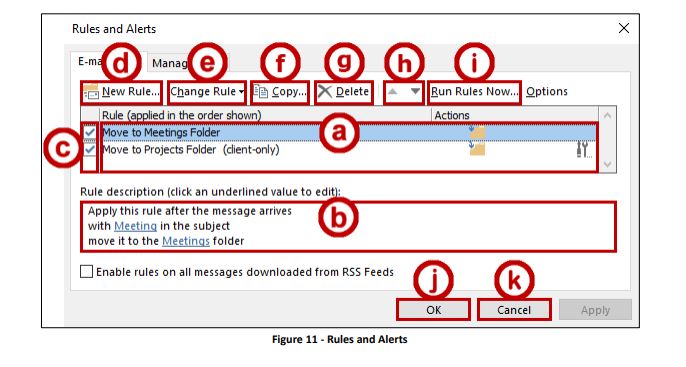
- a. Rules – Select a rule to manage (See Figure 11). Note: Client-only rules apply to your messages only when Outlook is running on an individual’s computer. These rules can only be created and edited in Outlook 2016. Certain conditions, actions, or exceptions that are applied to a rule will change it to a client-only rule (e.g. Action: Play sound). If you remove the item that makes it a client-only rule, then it will be changed back to a server-based rule.
- b. Preview – Shows what the currently selected rule will do (See Figure 11).
- c. On/Off – Turn on or off rules by selecting or unselecting the checkboxes (See Figure 11).
- d. New – Create a new rule (See Figure 11).
- e. Change Rule – Edit or rename a currently selected rule (See Figure 11).
- f. Copy – Copy a currently selected rule (See Figure 11).
- g. Delete – Delete a currently selected rule (See Figure 11).
- h. Move – Moves the currently selected rule up or down in the list (See Figure 11). Note: Rules are processed from top to bottom.
- i. Run Rules Now – If you want to manually run one or more rules (See Figure 11).
- j. OK – Saves changes made to rules (See Figure 11).
- k. Cancel – Cancels changes made to rules (See Figure 11).
Outlook Account: Click Here Blog: Click Here