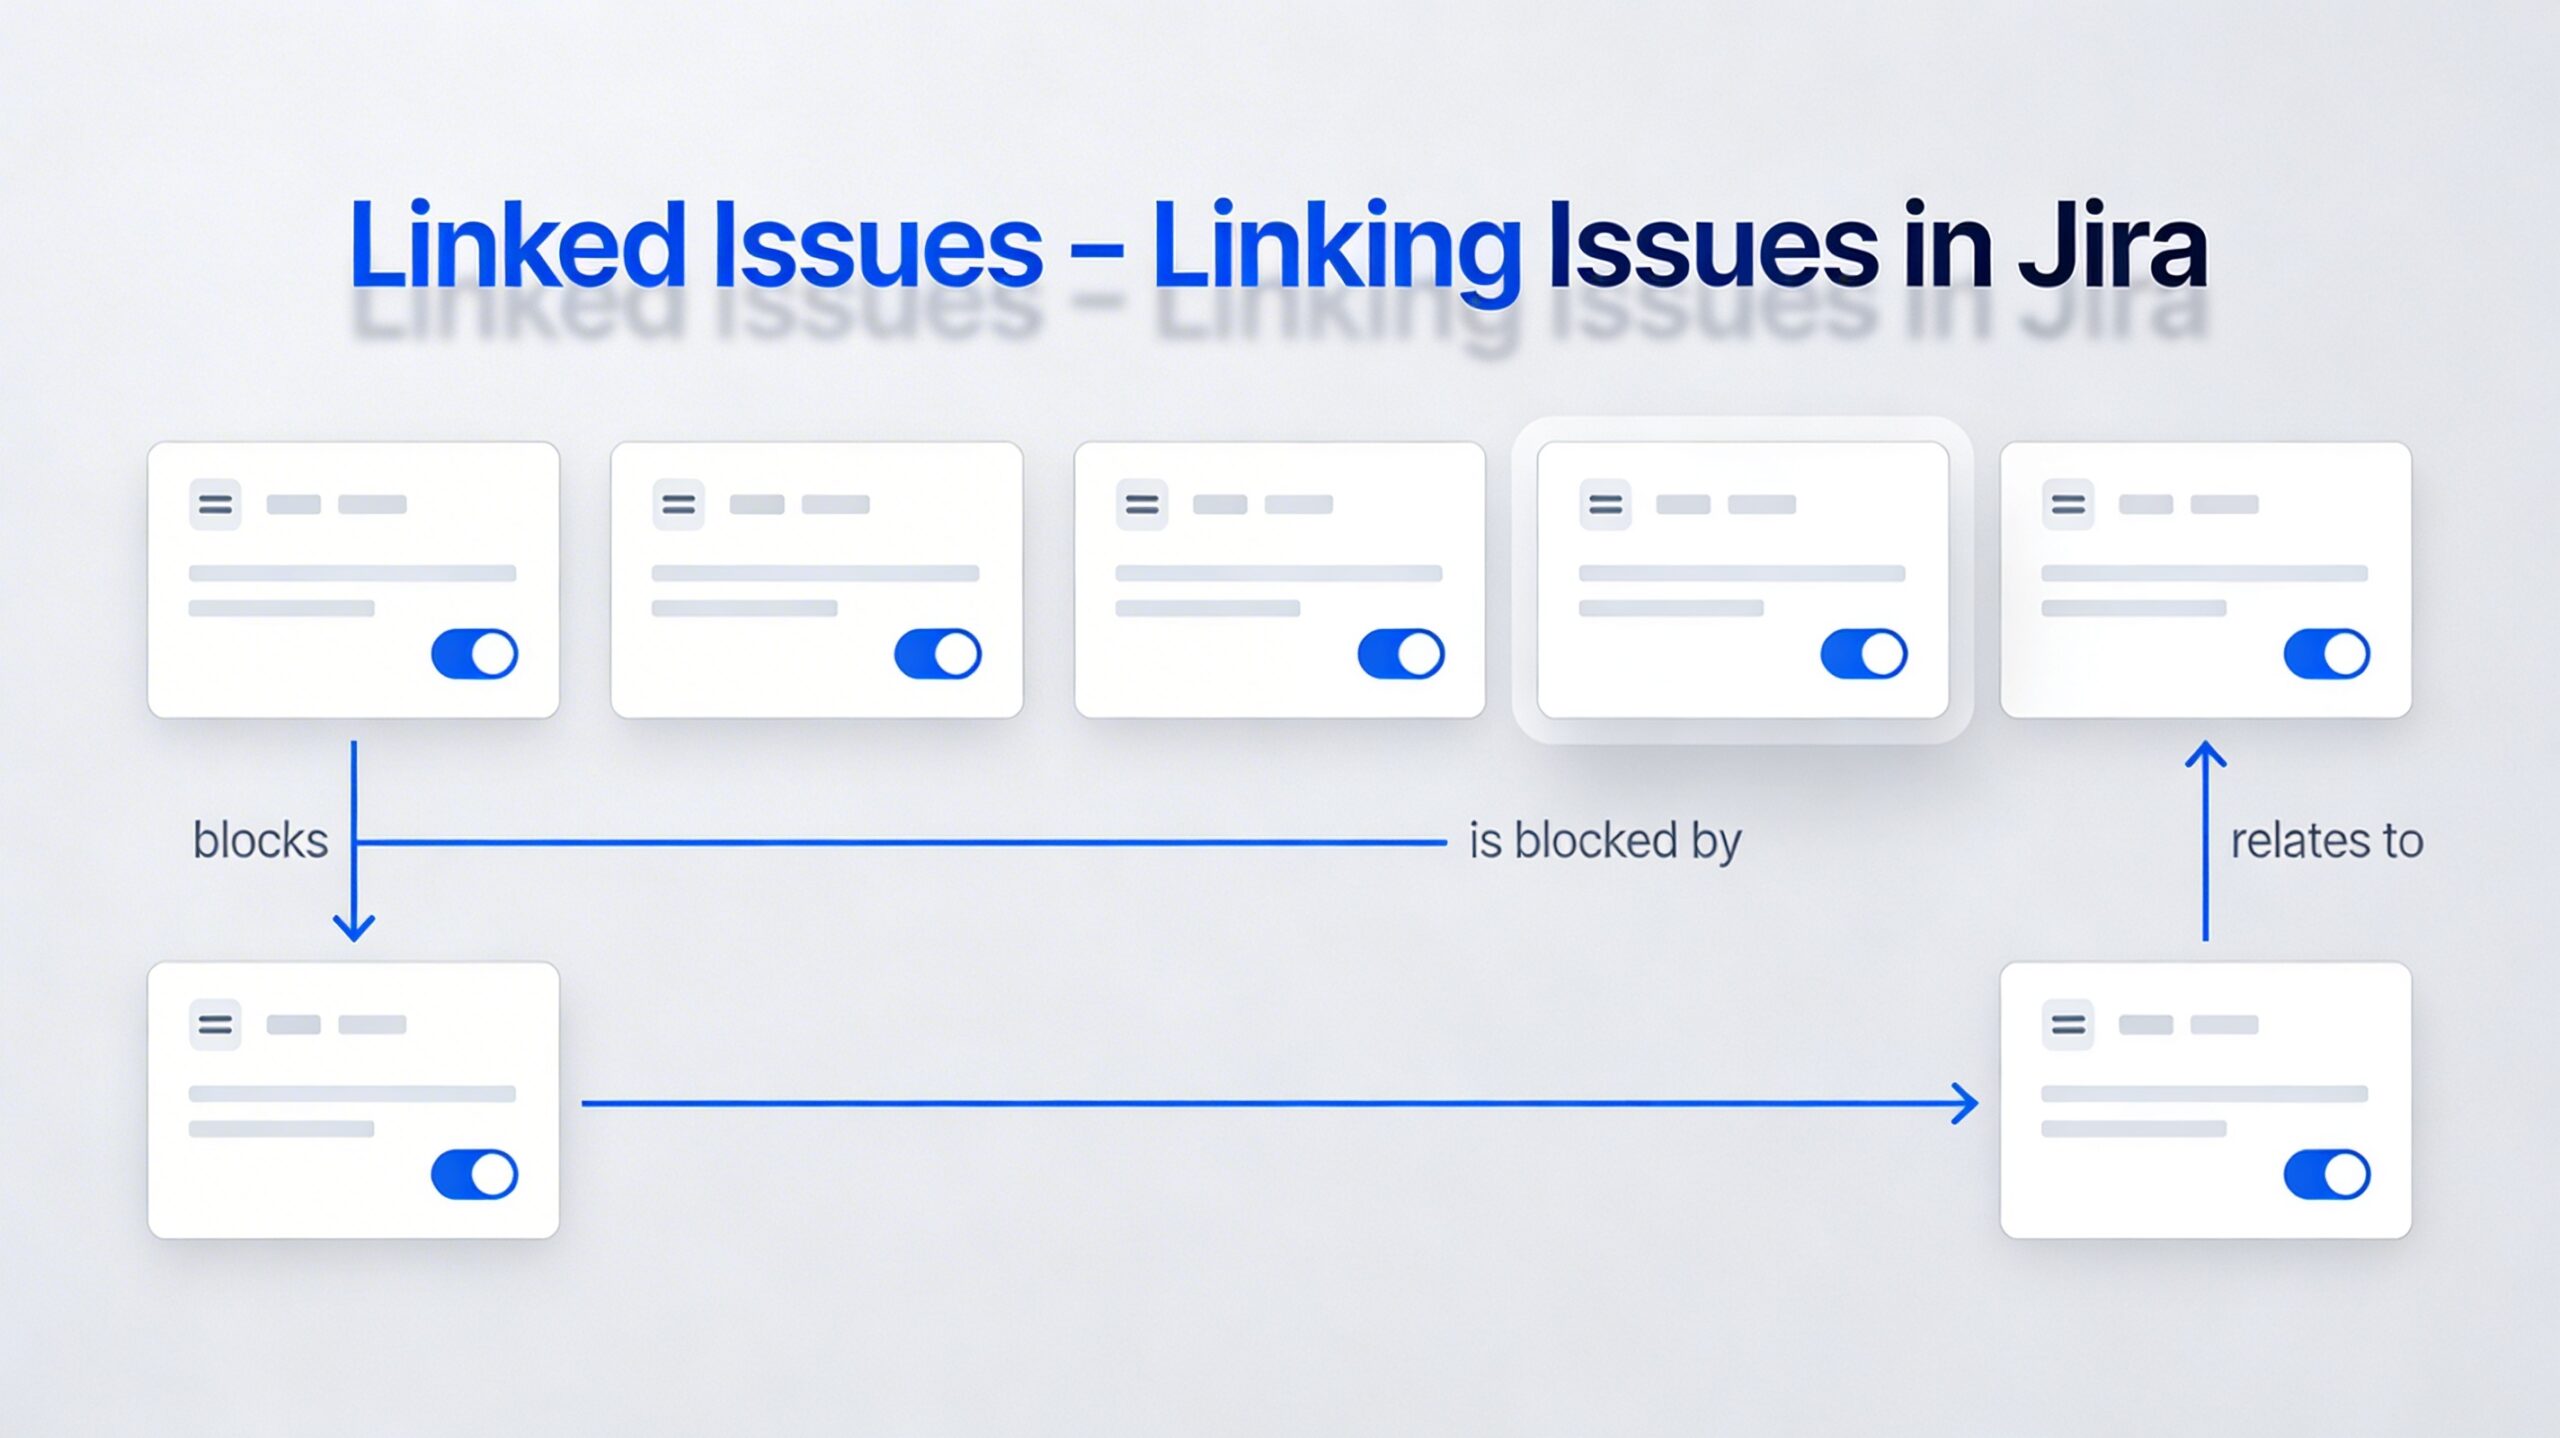
A linked issue is any Jira work item connected to another through a defined relationship. Common link types include blocks, is blocked by, relates to, duplicates, and clones, each describing a different kind of dependency or association. For example
-
- When one issue is a duplicate of another (e.g. if one person opened the issue and a second opened a similar or same issue).
- When one issue is blocked by another (e.g. if one Sub-task is deponent on the delivery of another Sub-task & might be blocked by that Sub-task, which certainly needs to be done first).
| Link type | Meaning |
|---|---|
| blocks | One issue prevents another from moving forward. |
| is blocked by | The current issue cannot be completed until another is resolved. |
| relates to | Two issues are connected, but neither directly depends on the other. |
| duplicates | One issue is a duplicate of another. |
| clones | One issue is a copy of another issue. |
Adding new entries to Linked Issues dropdown
New installations of Jira come with four default types of links:
-
- relates to / relates to – Use this link when two issues are related to each other but don’t have a direct dependency. For example, if two tasks are related to the same feature, you can link them as “relates to.”
- duplicates / is duplicated by – Use this link when one issue is a duplicate of another issue. For example, if someone reports a bug that has already been reported, you can link the two issues as “duplicate.”
- blocks / is blocked by – Use this link when one issue is blocking another issue from being completed. For example, if you can’t complete a task until someone else finishes their work, you can link the two issues as “blocks/blocked by.”
- clones / is cloned by – used when one issue is a direct copy of another issue. This link is useful when you want to create a new issue that is essentially a duplicate of an existing issue, but you want to track them separately.
If you need more link type then contact your JIRA administrator.
Linked Issues in JIRA
There are many different screens in Jira to create links between issues – the same end result, just different steps to get there. Let’s walk through the most common screen – creating links between existing issues from an issue’s detail view.
Option – A
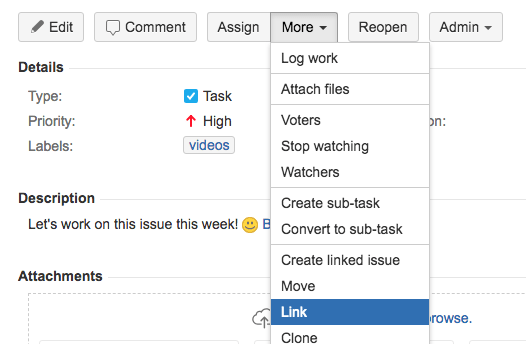
- Open the issue that you want to add a link to, click on “More”, then on “Link”.
- From the drop-down menu, you can describe why the link exists. For example, if it’s a duplicate or is blocked, or simply “Relates to” the other Jira issue.
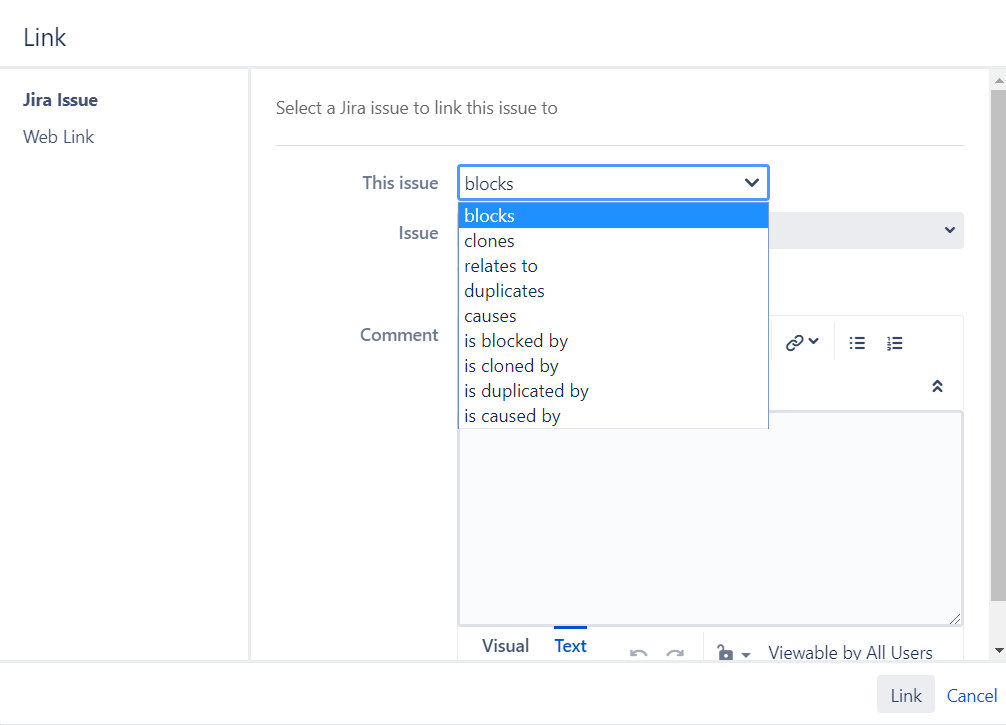
- Enter the name of the issue you want to link to in this field. Start typing its summary and select it from the suggested list. You can also search for an issue. Add a comment if you want to include additional information.
- Then click on “Link”.
Option – B
- Be sure you are viewing the project. From the Jira homepage, click on the name of the project to view it.
- Click on an existing issue to open a detailed view.
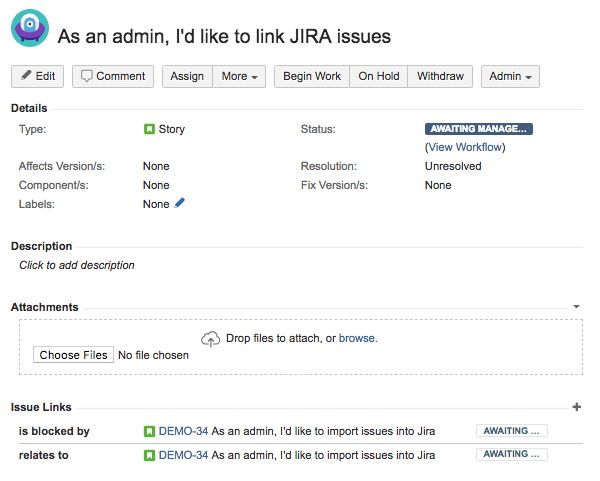
- Click the + button by the side of the Issue Links or the Edit button on the top.
- In the “Linked Issues” section, use the dropdown menu to select the type of relationship you want to create. In this example, the “is blocked by” relationship has been chosen.
- Use the search box below the relationship dropdown to specify which other issues you want to link to. Multiple issues can be linked at the same time.
- Click Link. Any links you created will now be listed in the issue’s detail view.
Delete a Linked Issue
In the issue, you’ll see the section “Issue Links” and the link to the related issue, including the linked issue’s status. Click on the trash icon that appears when you hover over the linked issue to delete the link, then click “Delete” to confirm you want to remove the link.
Streamline JIRA workflow using Linked Issues
- Understanding Issue Linking in Jira: Issue linking in Jira allows users to establish connections between related tasks, issues, or projects. By defining these relationships, teams can create a visual representation of the dependencies and hierarchy within their projects. Jira offers various types of issue links, including “blocks,” “relates to,” “duplicates,” and “is duplicated by.” These link types provide different perspectives on the relationships between issues, enabling teams to establish a clear understanding of how different pieces fit together.
- Improving Project Visibility: Linking issues in Jira significantly improves project visibility by providing a holistic view of the entire project. When teams link related issues, they create a web of connections that allows stakeholders to trace the progress and dependencies between tasks. This visibility enables project managers to identify potential bottlenecks, allocate resources effectively, and make informed decisions about prioritization. It also allows team members to comprehend the bigger picture and understand how their work contributes to the overall project goals.
- Enhancing Collaboration and Communication: Linking issues promotes effective collaboration and communication among team members. By establishing relationships between tasks, teams can communicate dependencies, prerequisites, and blockers more clearly. For example, if a task is blocked by another issue, linking them together helps everyone involved understand the dependencies and take appropriate action. Moreover, linking issues facilitates cross-team collaboration, as it enables teams working on different aspects of a project to stay informed about relevant updates and changes.
- Facilitating Comprehensive Issue Tracking: When you link issues in Jira, you create a network of interconnected tasks that can be tracked comprehensively. This feature allows you to identify the root causes of issues, trace their impact on other tasks, and monitor the progress of related work. By linking issues, you can easily navigate between them, ensuring that nothing falls through the cracks. It also helps in identifying potential risks and managing them proactively, as any changes or updates in linked issues can be promptly communicated and addressed.
- Leveraging Advanced Reporting and Analytics: The ability to link issues in Jira enhances the reporting and analytics capabilities of the platform. By analyzing the relationships between linked issues, project managers can gain valuable insights into the project’s progress, identify trends, and forecast potential delays or roadblocks. Linking issues enables you to generate comprehensive reports that provide a more accurate representation of the project’s status, highlighting dependencies and interdependencies between tasks.
JQL for Linked issues
All linked issues – If you want to get the list of issues linked to a specific issue, use the built-in JQL function linkedIssues(issueKey). e.g. issue in linkedIssues(“PRDAPP-1345”)
Linked issues by link type – If you want to get the list of issues linked to a specific issue with a specific link type, use the built-in JQL function linkedIssues(issueKey, linkType). e.g. issue in linkedIssues(“PRDAPP-1345”, blocks)
Issues linked to filtered issues – If you want to get the list of issues linked to a specific set of issues (filter of issues), use linkedIssuesOf(Subquery) function. e.g. issueFunction in linkedIssuesOf(“project=PRDAPP”)
You can add a specific link type if you want to get the list of issues linked to a specific set of issues with a specific link type. To do that, use the function linkedIssuesOf(Subquery, linkType). e.g. issueFunction in linkedIssuesOf(“project=PRDAPP”, Blocks)
If you want to include epic links and subtasks, use linkedIssuesOfAll(Subquery) function. e.g. issueFunction in linkedIssuesOfAll(“project=PRDAPP”)
Summary
Linking issues in Jira is a powerful way to establish relationships between issues and gain insights into your project’s overall progress. With several types of issue links available in Jira, you can choose the link that best fits the relationship between your issues. By following the simple steps outlined above, you can easily link issues in Jira and start tracking your project more effectively.
Recommended Reading
- Scrum Board – Create & Customize for Scrum Team
- Kanban Board – Create & Customize for Kanban Team
- Scrum Board – Tips and Tricks for JIRA
- JQL functions – Advanced searching in JIRA
- JIRA Structure – Create & Manage Epics and Stories
- JIRA Reports use in tracking Agile Projects
- Issue Analysis Reports use in Agile Projects
- Sprint ID for an Active or Closed Sprint
- Text Field search using advanced search in JIRA