JIRA Labels are tags or keywords that you can add to issues to show whether they possess certain characteristics. They let you classify issues more flexibly and more informally than by assigning version numbers or components. It is similar to the hashtag (#) used on Twitter, Facebook, or other social sites. Labels can be created and assigned to a task or a story so that the respective tasks can be found more easily using the filter. e.g. ABC software company designs mobile apps. Their app development project can have different components, for example, user interface (UI), Middle Layer, and Data Layer. These components divide their work into broad categories, but the project team might require further classification, especially in the form of tagging. This is where labels come in. Developers want to associate issues according to their statuses, even if the issues don’t belong to the same component, they can mark issues as “Ready_UAT” or “SME_Review” to be able to find them easily.
Adding and removing labels in Jira issues
To add labels, a user has to go to the View Issue page and select the issue that needs to add labels.
If the Labels row is shown in the issue then click on the pencil icon next to the Labels field in the Details section of the issue. The Labels dialog box will appear. You can also use the keyboard shortcut (lowercase L) to open the dialog box faster.
If it is not shown on the issue page then Click on More → Labels. A dialogue box will appear.
To add a label, either select one from the list or create a new one by simply typing it. To remove a label, click on the x next to the label. Then click Update.

To remove a label from the list of labels, you must remove the label from all the issues (using the method explained above). Once the label has been thus removed, it will no longer be visible in the list of labels.
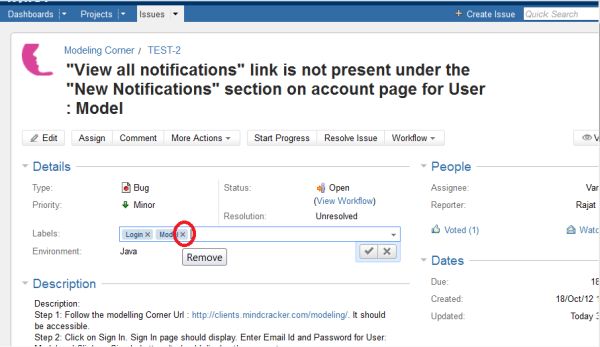
Click on the Update button. Labels are added/removed from an issue and can be verified in the Detail Section of the View Issue Page.
Note: You can add multiple labels by typing them in, separated by spaces. This also means your labels cannot contain spaces. In order to create multiple-word labels, you should use hyphens or underscores.
Searching for Issues using Label
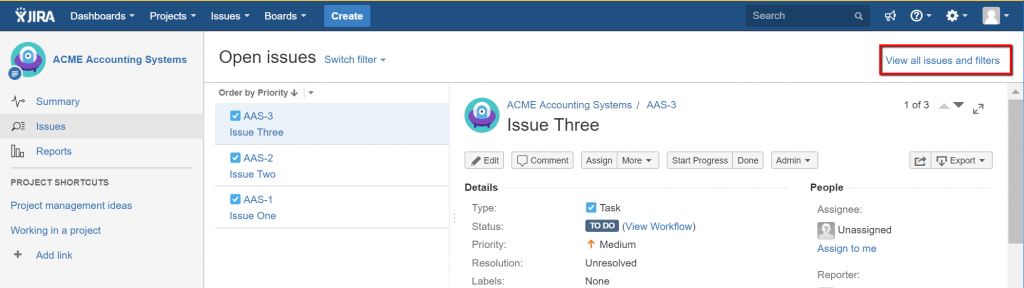
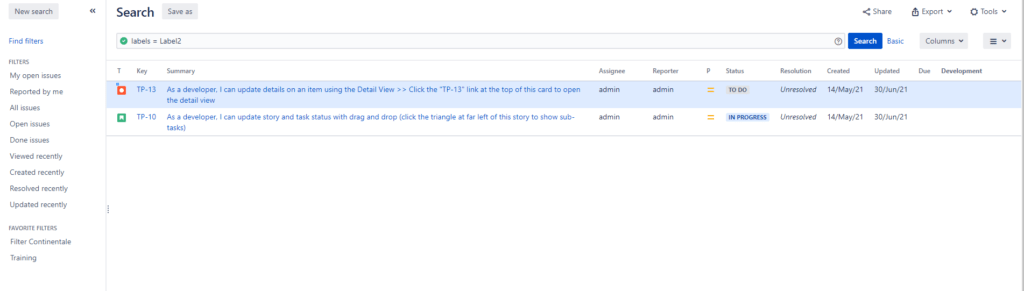
We want to use the Jira search capability to maintain and tidy up the labels that have been assigned to our issues. To start let’s use the Jira search capability to find our labeled issues. First, navigate to the search page in Jira. From the project page, you can get there by selecting the ‘View all issues and filters’ link.
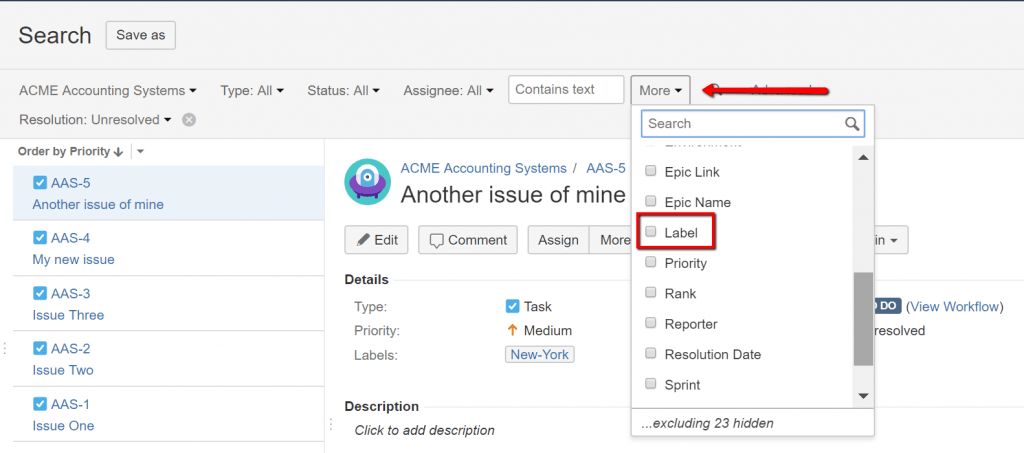
To search on labels we’ll need to add that option to our search criteria using the ‘More’ drop-down box:
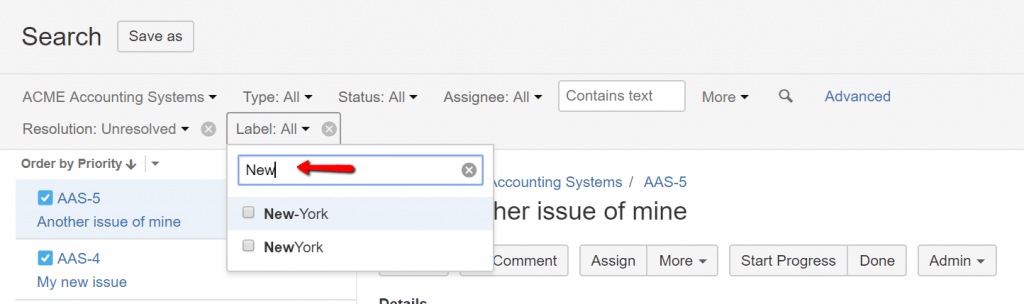
Once that’s selected we’ll be able to search for all our issues based on a label. If you start out searching with the text you’ll see Jira shows us all the similar labels.
For Advance search, you can add more columns like priority of ‘High’ with label ‘XYZ’ to our search criteria. Use the ‘More’ drop-down to add the ‘Priority’ field.
Display labels within the card layout
To display labels in the card layout of agile boards, proceed as follows:
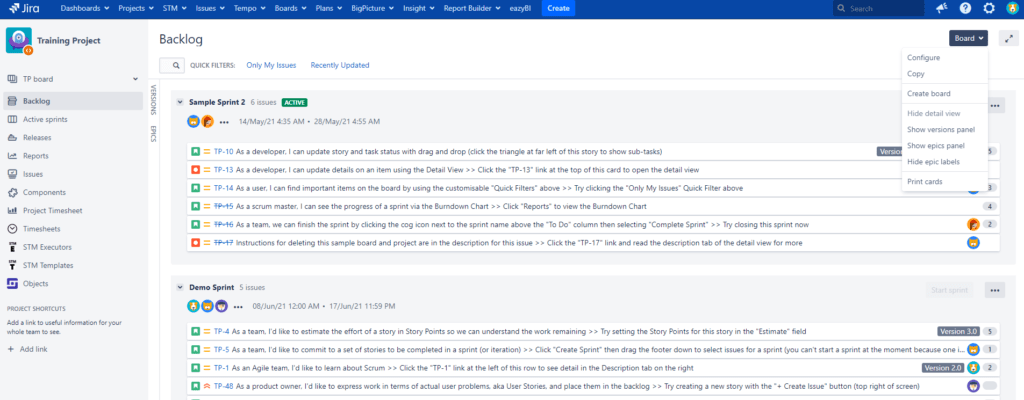
In the agile board in which you want to display labels, click in the top right corner on “Board” and in the pop-up menu on “Configure”.
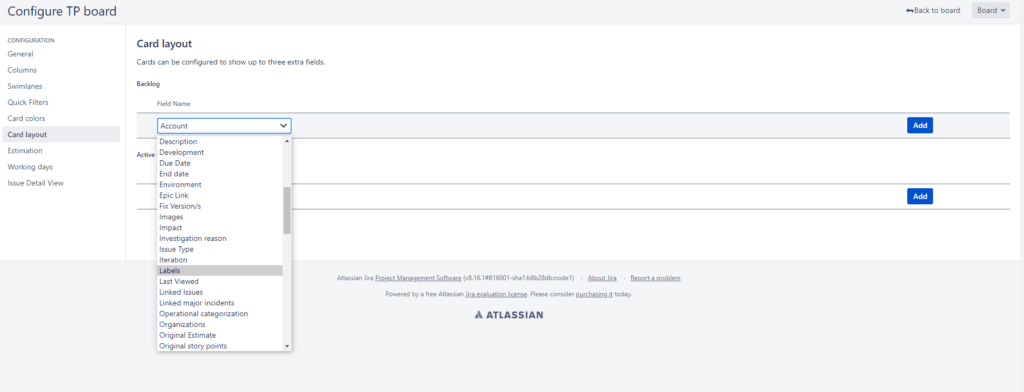
When you are in the configuration menu, select “Card layout” on the left side. Here you can select labels and then click on the blue Add button to add them.
You are also able to configure your labels for your active sprint at this point.
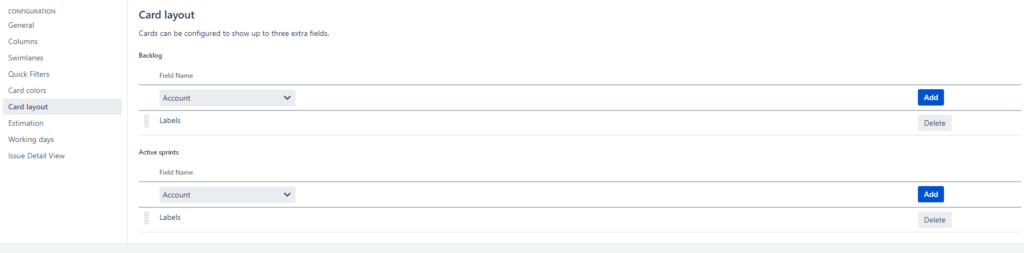
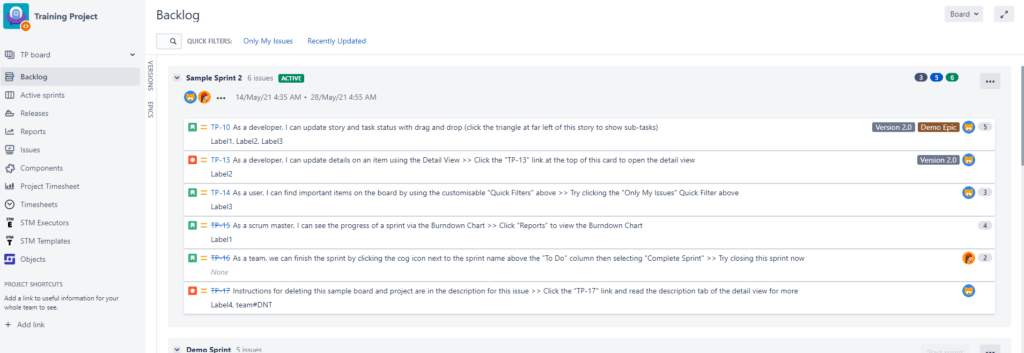
After you have clicked on “Add”, your labels will be displayed in your backlog and your active sprint.
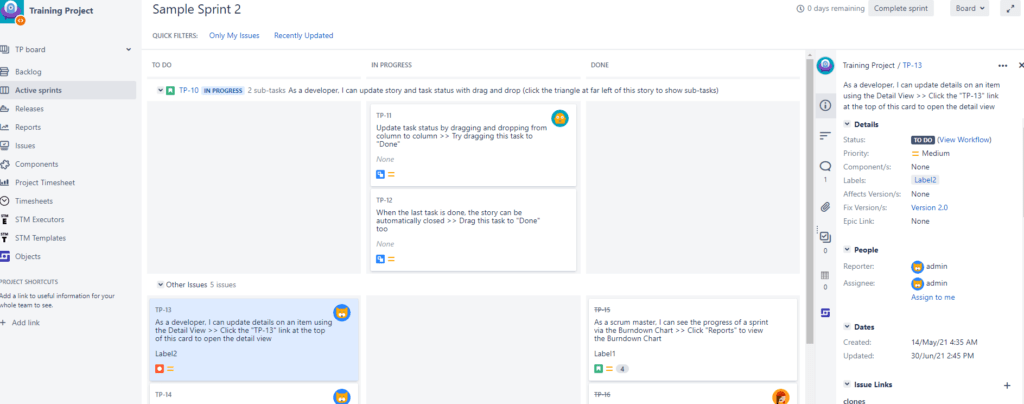
If you now select an issue in your active sprint and click on the label, you will be shown all issues that have been assigned to this label.
You can use the same procedure for Kanban boards in Jira as well.
Bulk Change to JIRA Labels
Using a search filter find all the issues present for a particular label. Now we need to change the label. We will use ‘Bulk Update’.
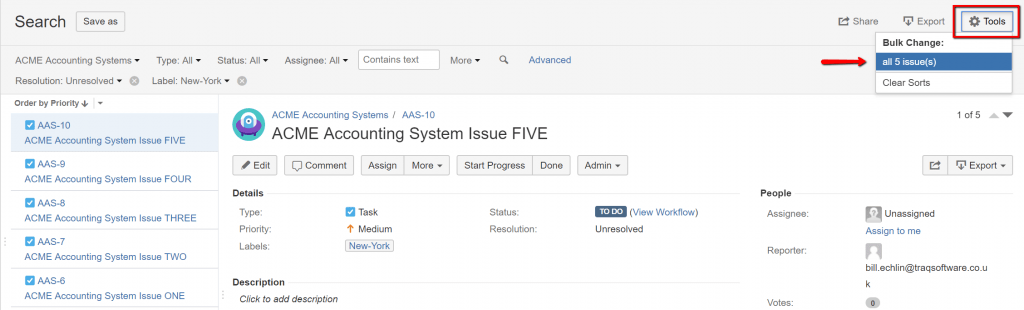
Select the ‘Bulk Change’ – ‘All issues’ option. First, we select the issues (all or just some of them):
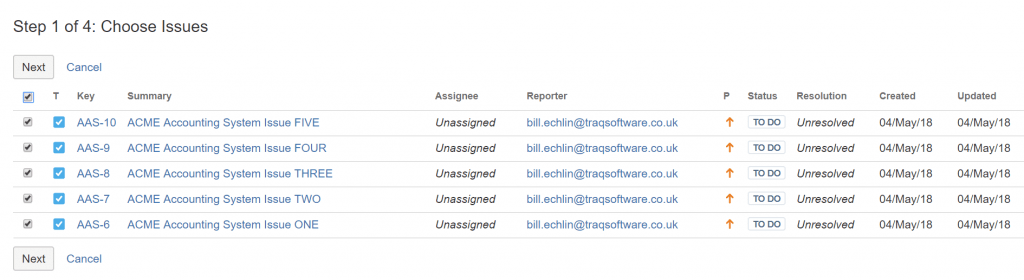
Select all issues in the list and click ‘Next’. Then we select the operation. In our case that’s the ‘Edit issue’ operation.
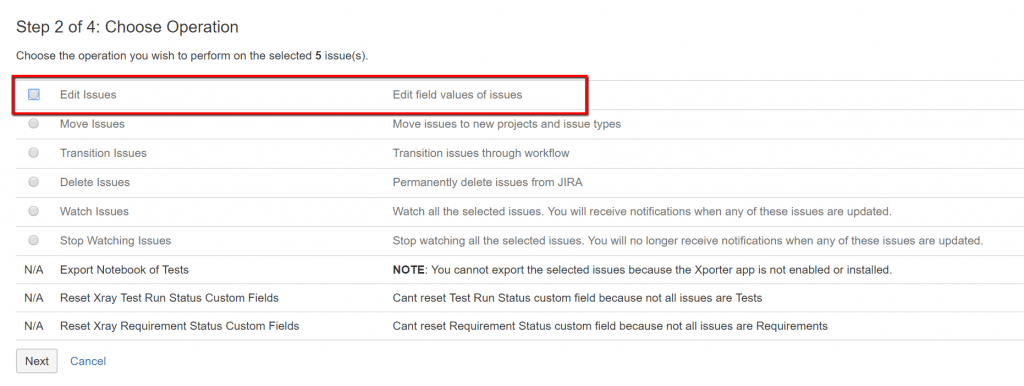
Select ‘Edit issues’ and click next. The following ‘Operation Details’ screen lets us set updated field values for all the issues in our bulk update operation. On the operation details page we need to update the labels section.

Select ‘Change labels’ – ‘Add to Existing’ and we’ll add the label.
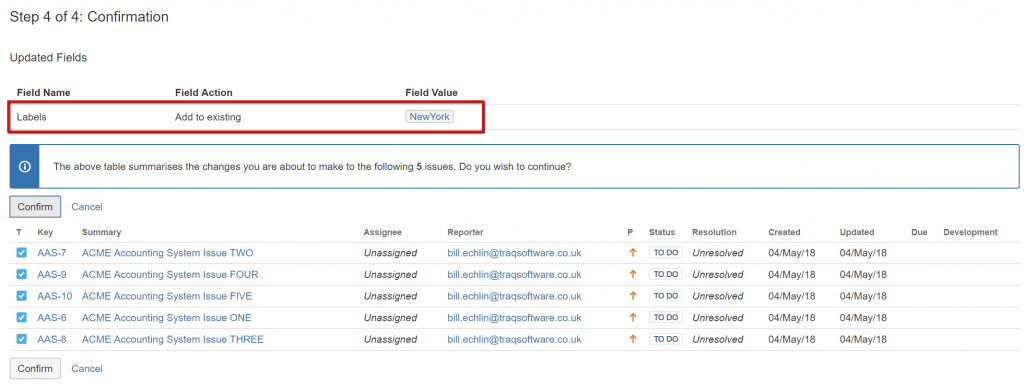
Click next and apply that change. At which point we should be on the ‘Confirmations’ screen.
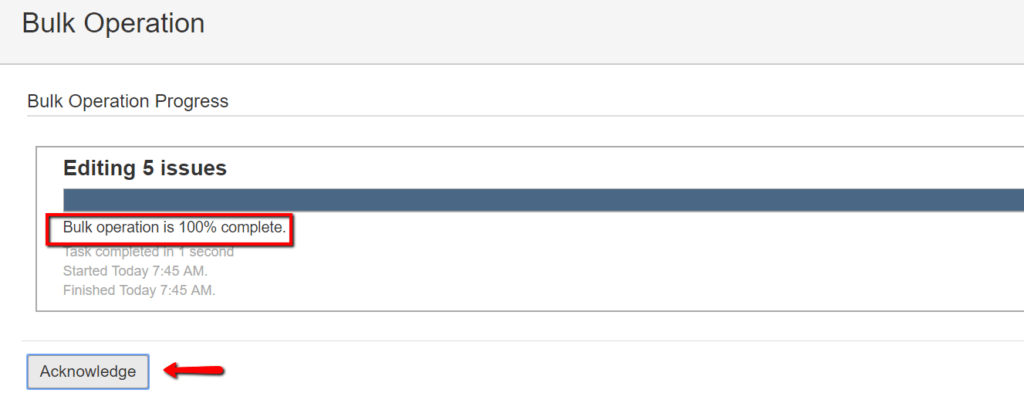
Check you have the right update defined and the correct list of Jira issues you want to update. Then click ‘Confirm’. At which point you should see the confirmation screen where you just need to ‘Acknowledge’ the update.
Best Practices for JIRA Label
To best take advantage of the benefits of labels and minimize potential pitfalls, here are some recommendations you can share with your team:
- Only add a label if the connection you’re trying to establish doesn’t already exist. (For example, don’t use a label to indicate that an issue belongs to a particular epic.)
- Always check to see whether a label already exists before creating it; remember, too, that it might simply be a question of spelling or case variation.
- Avoid using abbreviations unless they are widely understood and accepted by your team. This will, in turn, help avoid synonyms.
- Don’t create too many labels, as the complexity of managing them increases with their number.
Conclusion
JIRA labels offer a dynamic and adaptable means of organizing and classifying issues within a project. When used effectively, they contribute to streamlined workflows, improved search capabilities, and enhanced collaboration. By establishing clear conventions, integrating labels into workflows, and regularly reviewing their usage, teams can unlock the full potential of JIRA labels for efficient issue management.
In the dynamic landscape of project management, JIRA labels stand as a valuable tool, providing teams with the flexibility they need to tailor their processes to the unique requirements of their projects.
Recommended Reading
- Scrum Board – Create & Customize for Scrum Team
- Kanban Board – Create & Customize for Kanban Team
- Scrum Board – Tips and Tricks for JIRA
- JQL functions – Advanced searching in JIRA
- JIRA Structure – Create & Manage Epics and Stories
- JIRA Reports use in tracking Agile Projects
- Issue Analysis Reports use in Agile Projects
- Sprint ID for an Active or Closed Sprint
- Text Field search using advanced search in JIRA
JIRA Reference: Click Here